Table of Contents
Introduction
Vibration testing is essential for assessing the durability and reliability of products, especially in industries where mechanical stress and environmental conditions can impact product performance. This guide will provide an in-depth look at vibration testing systems, covering the core components, installation processes, troubleshooting steps, and safety considerations.
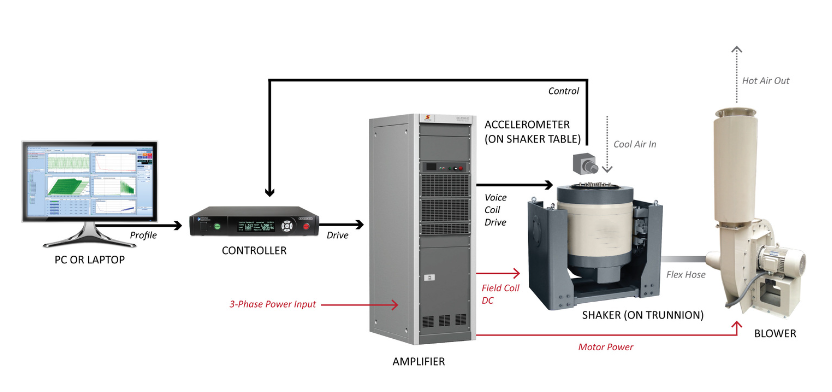
Components of Vibration Testing System
The vibration testing system consists of multiple essential components, each playing a vital role in the overall process. Let’s take a closer look at each of them:
Vibration Shaker
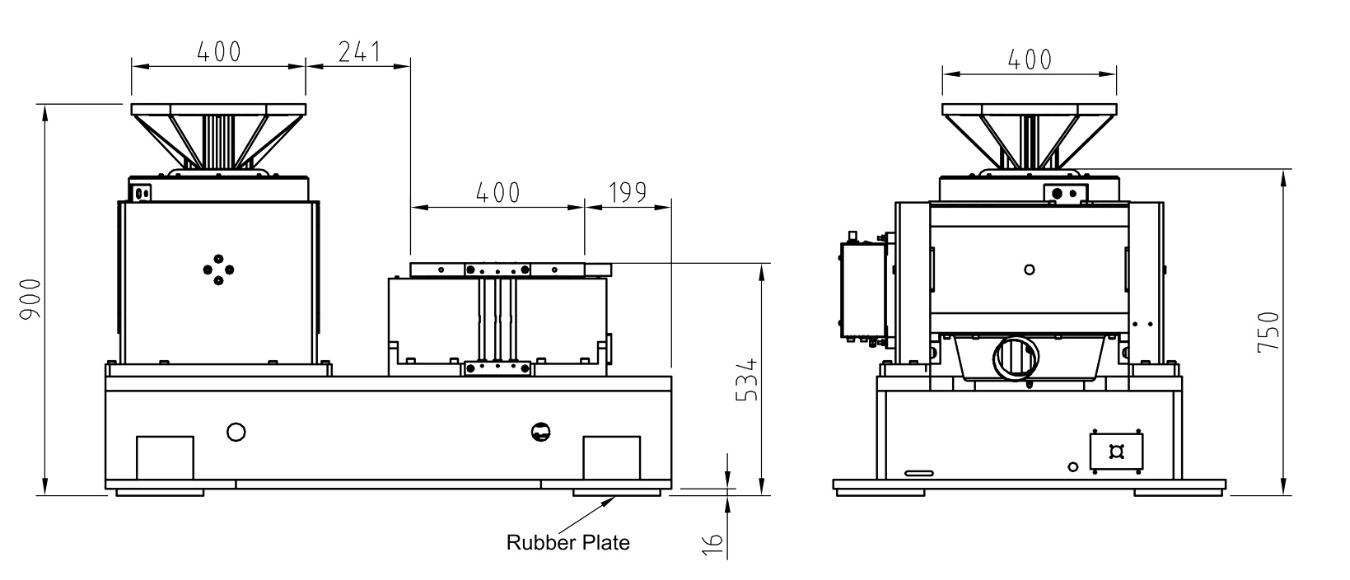
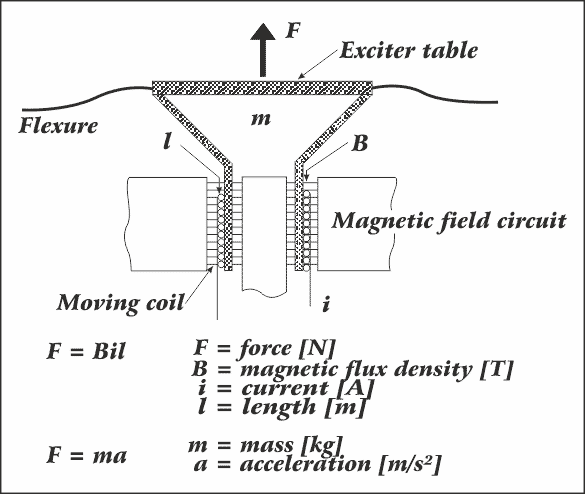
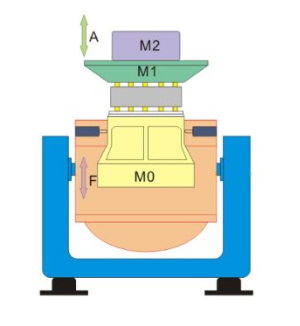
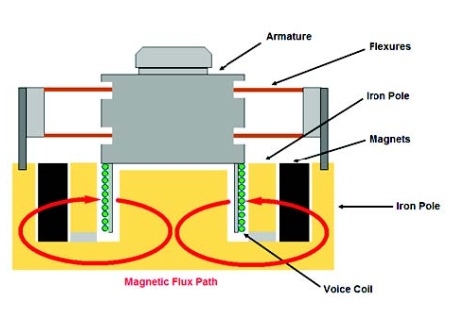
The vibration shaker is the central piece of equipment responsible for generating the vibratory forces required during testing. It is designed to simulate the vibrations that a product might experience in its operational environment. Vibration shakers come in various types, such as electro-dynamic and piezoelectric models, depending on the frequency range and power requirements.
Power Amplifier
The power amplifier amplifies the input signals from the controller and converts them into high power, driving the vibration shaker. A Class D power amplifier, for example, uses pulse-width modulation (PWM) to provide high efficiency and stable performance. This component ensures the shaker receives the necessary power to produce the intended vibration levels.
Vibration Controller
The vibration controller is responsible for regulating the testing parameters such as frequency, amplitude, and waveforms. It ensures that the shaker operates at the correct levels throughout the test. The controller also records data and provides feedback for analysis, enabling engineers to make necessary adjustments and monitor the equipment’s performance.
Cooling System
During vibration testing, the equipment can generate significant heat, which needs to be dissipated to prevent overheating. Cooling systems are used to maintain optimal operating temperatures for the shaker and amplifier. Forced air cooling is a common method, but liquid cooling systems may also be employed for higher power setups.
Installation and Setup
Proper installation of the vibration testing system is critical for ensuring accurate test results and preventing damage to the equipment. Key factors include:
Electrical Connections: Ensure that all electrical components are connected correctly and securely, following manufacturer guidelines.
Space Environment: The system should be installed in a vibration-free environment to avoid external interference during testing.
Weight and Size of Test Items: Always check the dimensions and weight limits of the testing platform to avoid damage or inaccurate readings.
Ventilation: Ensure there is adequate ventilation, particularly if using liquid cooling systems, to prevent overheating.
Water Circulation Systems: For cooling purposes, ensure that any water circulation system is properly installed and operational.
Troubleshooting and Maintenance
Regular maintenance is essential for maintaining the reliability and longevity of the vibration testing system. Common issues include:
Power Issues: Ensure that the power supply meets the required specifications and check for any loose connections or damage.
Overheating: Check the cooling systems regularly and clean filters to maintain airflow.
Erratic Vibration Patterns: Verify that the vibration controller and shaker are properly synchronized. Check for any mechanical faults or electrical interference.
By performing routine checks and promptly addressing issues, engineers can ensure that their vibration testing system operates efficiently and provides accurate results.
